Top Basement Waterproofing Upgrades for Older Properties
@travissgku031
October 20, 2026 · 16 min read

Older homes have a way of winning people over. Thick plaster walls, full-dimension framing lumber, stone or brick foundations, and details you simply do not see in newer construction can make an older property feel solid and lasting. Then the basement reminds you that age has a price. Musty air, white mineral staining on the walls, damp corners after a storm, or a sump pump that seems to run nonstop are all signs that time, water, and soil pressure have been negotiating behind the scenes for decades.
Basement Waterproofing in an older property is rarely about one miracle product. It is usually a matter of understanding how the house was built, how water moves around it, and which improvements will solve the actual problem instead of covering up the symptoms. Many older basements were never designed to be dry, conditioned living spaces. They were meant to be service areas, places for coal, mechanicals, storage, and laundry. The materials, drainage assumptions, and wall systems reflect that reality. Trying to make that kind of basement behave like a modern lower level without the right upgrades almost always leads to disappointment.
The best results come from treating water management as a system. Outside grading, roof drainage, foundation condition, interior drainage, vapor control, and mechanical humidity control all have to work together. Miss one major weak point and the rest of the investment often underperforms.
Why older basements fail in their own particular way
A newer poured concrete basement with intact perimeter drainage usually has different issues than a 1920s stone foundation or a mid-century block wall. Older homes often sit on foundations with lime-based mortar, irregular stone, aging parging, or hollow concrete block. Those materials can handle a surprising amount of movement and moisture exchange, but they also become vulnerable when they are asked to stay bone dry without proper drainage support.
I have seen many older basements where the owner focused on the wall surface because that is what looked wet. The real problem turned out to be roof water dumping at the base of the house, a negative grade hidden under landscaping, or a driveway pitching runoff straight toward the foundation. I have also seen the reverse, where a homeowner spent heavily on exterior excavation when the biggest daily source of dampness was indoor humidity condensing on cold walls and pipes.
That is why the first upgrade is often not glamorous. It is diagnosis. Before choosing products, a good contractor or building professional will look at when the water appears, where it enters, what the walls are made of, whether the slab is involved, and how the exterior handles runoff. A basement that gets damp only after wind-driven rain behaves differently from one that leaks during spring thaw, and both differ from a basement that stays humid all summer because warm air is meeting cool masonry.
Start where the water begins, roof drainage and grading
If I had to name the most cost-effective waterproofing upgrade for an older property, it would be improved rainwater management at the roofline and around the perimeter. It is common to find houses with undersized gutters, loose downspouts, clogged leaders, or downspout discharge ending right beside the foundation. That setup can dump hundreds of gallons of water into the same narrow strip of soil during a single storm.
Reworking the gutter and downspout system often changes the whole basement. Larger gutters may be needed if the roof area is substantial or the local climate brings intense storms. Downspouts should discharge well away from the foundation, often through solid extensions or buried lines that daylight safely downhill if the site allows. Splash blocks help in some situations, but on tighter lots they are often not enough. The goal is simple, water should leave the roof and keep traveling away from the house.
Grading matters just as much. Over time, mulch beds build up, walkways settle, and landscaping traps water against the wall. The ideal grade slopes away from the house for the first several feet. On older properties, especially in established neighborhoods, that is sometimes hard to achieve because of lot lines, porches, mature trees, or adjacent paving. Even so, small corrections often make a large difference. I have seen a persistent leak at one corner disappear after regrading a flower bed and extending a downspout another ten feet.
These are not flashy upgrades, but they are foundational. When exterior water load drops, every other waterproofing measure has less work to do.
Exterior membrane and footing drain upgrades
When an older basement has chronic seepage through foundation walls or water entry at the cove joint where the wall meets the slab, exterior excavation can be the most thorough fix. It is also among the most disruptive and expensive, so it needs to be justified.
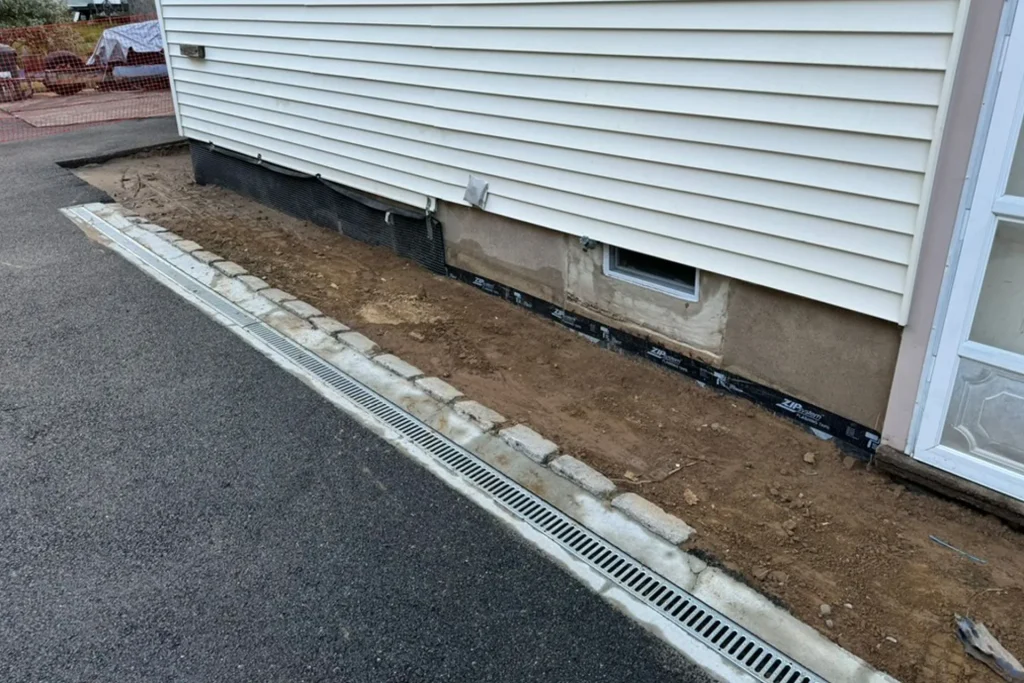
On the right house, exterior waterproofing is excellent because it stops water before it enters the wall assembly. The process usually involves excavating down to the footing, cleaning the foundation wall, repairing defects, applying a waterproof membrane, adding a protection board or drainage board, and installing or replacing footing drains. On older homes, this work often reveals years of hidden patching, failed mortar, root intrusion, or blocked drains filled with silt.
Stone and brick foundations deserve special care here. They are not smooth poured concrete surfaces, and they often need repointing or parging before a membrane can perform properly. The wrong coating on old masonry can trap moisture in ways that damage the wall over time. Breathability, adhesion, and compatibility matter. A contractor who mainly works on newer tract homes may not recognize those nuances.
Exterior excavation is often most valuable when the basement will be finished, the water pressure is significant, or the wall itself is deteriorating. It is less attractive on properties with tight access, mature hardscaping, attached decks, or neighboring structures close to the foundation. The work can also become complicated if asbestos-containing materials, lead-painted surfaces, or old utility lines are present.
Still, when the conditions are right, few upgrades are as complete. You are addressing hydrostatic pressure, protecting the wall from repeated wetting, and giving subsurface water a controlled path away from the house.
Interior perimeter drainage and sump systems
Not every older property is a good candidate for exterior excavation. In those cases, an interior drainage system paired with a sump pump is often the practical answer. This approach does not stop water from reaching the foundation wall, but it intercepts it once it enters or accumulates at the footing level and channels it to a controlled discharge point.
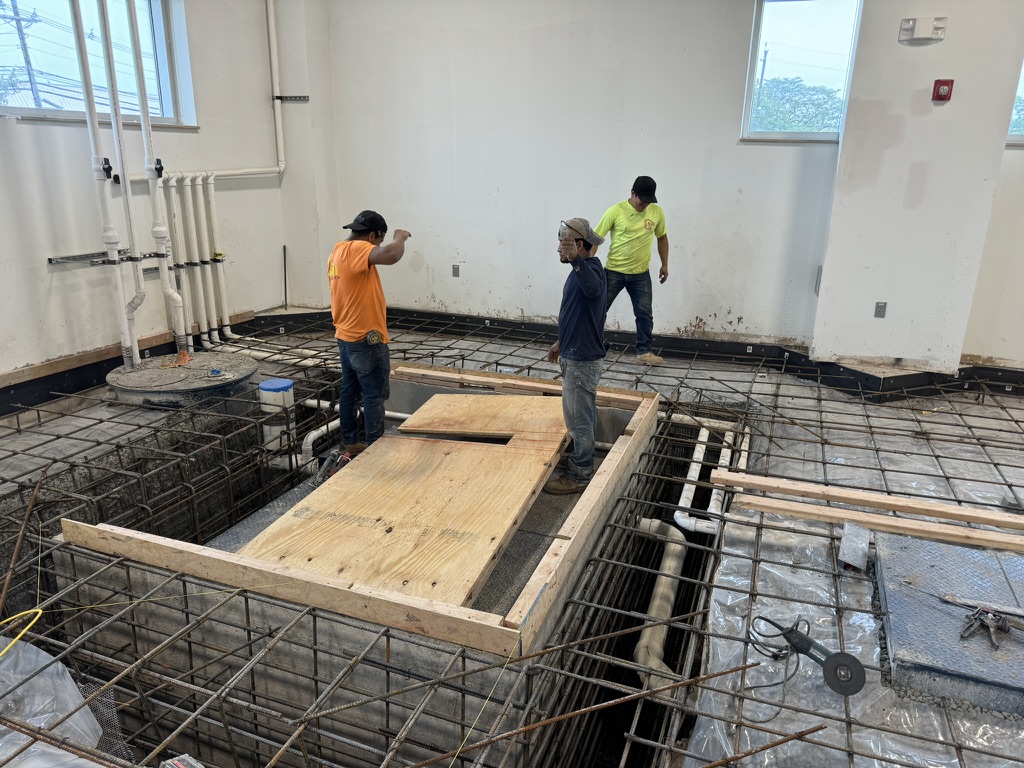
Installed correctly, these systems can be very effective. A narrow trench is cut around the basement perimeter, drainage material and piping are installed, and the trench is tied into a sump basin. Water that comes through the wall, under the footing edge, or at the slab perimeter moves into the system instead of spreading across the floor. In older homes with irregular foundations, the details matter a lot. A contractor needs to understand where the water is actually traveling. On some stone foundations, wall drainage channels are added so seepage within the wall can drop into the perimeter system.
Sump pump selection deserves more attention than it usually gets. A pump is not just a pump. Head height, discharge length, flow rate, check valve quality, basin design, and power backup all affect real-world performance. Older neighborhoods are often the same neighborhoods with aging electrical infrastructure and mature trees that can bring lines down during storms. A battery backup or water-powered backup is not a luxury if your basement floods when the power goes out.
A reliable sump setup should include a lid that limits moisture and radon movement, a discharge line protected against freezing, and an outlet location that does not send the water right back toward the foundation. I have seen expensive interior drainage systems undercut by one careless discharge point.
For many homeowners, this is the upgrade that changes their relationship with the basement. It may not look dramatic after installation, but the difference after a hard rain can be immediate.
Crack repair that respects the structure
Not every basement leak calls for a full drainage overhaul. Some older properties have relatively dry basements except for isolated wall cracks, pipe penetrations, or cold joints. In those cases, targeted repairs can make sense, provided the cracks are stable and the wider drainage picture is under control.
On poured concrete foundations, epoxy or polyurethane injection can seal certain cracks very effectively. Polyurethane tends to be used where active water is present because it can expand and block seepage. https://www.google.com/maps?cid=15618896523686751270 Epoxy is more structural in nature. On masonry, block, brick, or stone, repairs tend to involve repointing, masonry patching, and sometimes localized waterproof coatings used with caution and the right prep.
The warning here is simple. A crack seal is only as good as the movement and pressure behind it. If the wall is shifting seasonally, bowing inward, or taking on major hydrostatic load from outside, surface crack repair alone may buy only a temporary reprieve. I have seen homeowners celebrate a successful crack injection in October, only to call back in March because groundwater pressure found the next easiest path.
When evaluating cracks in an older property, it helps to distinguish cosmetic shrinkage from signs of structural distress. Horizontal cracking in block walls, stair-step cracking in masonry, and repeated widening are different conversations from a small, long-stable vertical crack in a poured wall.
Vapor barriers, insulation, and the finish-out mistakes that cause trouble
A dry basement can be ruined by a bad finishing strategy. This is one of the most common problems in older homes that have been renovated in stages. Someone adds carpet, wood studs, fiberglass insulation, and painted drywall against a cool masonry wall. It looks good for a year or two. Then the baseboards swell, the drywall smells musty, and mold appears behind the furniture.
Basement Waterproofing is not complete when bulk water is controlled. Older basements also need a sensible approach to vapor and temperature. Masonry walls can absorb and release moisture. Interior air can condense on cold surfaces. If you trap that moisture behind finish materials that are food for mold, the wall assembly becomes a problem even when visible leaks are gone.
Rigid foam insulation or other moisture-tolerant insulation strategies generally perform better against foundation walls than fiberglass batts placed directly against masonry. A capillary break between concrete and framing is important. So is avoiding organic materials in places where minor moisture events are still possible. Every basement is a little different, but the common theme is this: build for resilience, not wishful thinking.
A basement that remains unfinished can still benefit from selective vapor management. In some cases, a sealed wall system or a floor vapor control approach is appropriate. In others, the smarter move is not adding an impermeable layer that traps moisture in the wrong direction. This is where older homes demand judgment. There is no universal recipe.
Dehumidification is not a substitute, but it is often essential
One of the most underrated upgrades in an older basement is a dedicated dehumidification strategy. It is not a replacement for drainage or repairs, but it frequently turns a technically dry basement into a usable one.
Many older basements maintain relative humidity well above 60 percent in warm months, even with no obvious leaks. That level invites musty odors, mold growth on stored contents, and rust on tools or mechanical equipment. A high-capacity dehumidifier, ideally one that drains automatically to a sump or condensate line, can stabilize the environment dramatically. Better units allow humidity set points, continuous operation, and ducted treatment for larger spaces.
This is especially helpful in shoulder seasons. Spring and early summer often bring the worst moisture complaints because cool basement surfaces meet warm, damp outdoor air. Homeowners open windows hoping to air the place out, and the basement gets wetter in a different way. In that situation, closing the windows and running controlled dehumidification usually works far better.
If a homeowner tells me the walls are not visibly leaking but cardboard boxes always feel soft by July, I start thinking about humidity control right away.
Window wells, stair entries, and the details that get ignored
Some of the worst localized basement leaks come from places that are easy to overlook because they are not technically part of the foundation wall. Old steel-framed basement windows, poorly drained window wells, and exterior stair entries can funnel water straight into the house.
Window wells need drainage or at least a path that does not allow them to become bathtubs during a storm. Covers help if they are properly fitted and do not create other maintenance issues. Basement entry stairs often crack away from the house or collect runoff at the landing. Water then pushes against the door threshold or sneaks under aging weatherstripping.
These are often relatively modest upgrades compared with perimeter systems, but they can solve stubborn nuisance leaks that make a basement seem worse than it is. On older properties, details matter because there are simply more points where age and weather have had time to exploit a weakness.
When drainage meets structure
Waterproofing and structural repair often overlap in older basements. A wall that bows inward may need reinforcement before or along with water management upgrades. A settled corner may keep reopening the same crack after every patch. A crumbling stone wall may need repointing or partial rebuilding before any membrane or interior system has a stable base to work with.
This is where homeowners can get into trouble by collecting piecemeal bids. One contractor sells an interior drain. Another sells carbon fiber straps. Another offers crack injection. Each may be competent within a narrow scope, but older properties often need a coordinated plan. The best solution is not always the one that fixes the symptom you can see today. It is the one that addresses the failure mechanism that will still be there five winters from now.
Here are the upgrades that most often provide the best return on older homes when matched to the right conditions:
- Gutter, downspout, and grading corrections to reduce water loading at the foundation.
- Interior perimeter drainage and a properly designed sump system for chronic seepage.
- Exterior excavation with membrane and footing drain replacement when hydrostatic pressure is severe or walls are being restored.
- Targeted crack, joint, and masonry repairs where water entry is localized and structural movement is understood.
- Dedicated dehumidification and moisture-smart finishing details to keep the basement stable after water control work.
Notice that none of these stand alone in every case. A finished basement with old block walls might need numbers two and five. A stone foundation with heavy runoff problems may need number one before anything else. A house on a slope with one bad rear wall may justify number three on that side only.
Choosing upgrades by symptom, not by sales pitch
A basement does not care what package name is on the brochure. Water patterns tell the story if you pay attention. If the floor gets wet only after heavy rain, start outside and at perimeter drainage. If the air always feels clammy in summer with no standing water, address humidity and cold-surface condensation. If one crack leaks after snowmelt, investigate soil saturation, downspout discharge, and crack stability before committing to a whole-system installation.
The most expensive proposal is not automatically the best, and the cheapest patch often becomes the costliest over time. I generally advise homeowners to ask any waterproofing contractor a few direct questions:
- Where is the water coming from, specifically?
- What evidence supports that diagnosis?
- What will this system prevent, and what will it not prevent?
- How is discharge handled once water is collected?
- What maintenance or backup provisions are required over time?
The answers reveal a lot. A professional who knows older basements should be comfortable talking about wall type, site drainage, humidity, seasonal timing, and limitations. If every problem gets the exact same solution, caution is warranted.
The upgrades that age well
The best basement waterproofing improvements for older properties tend to share one trait. They respect the building instead of fighting it blindly. They reduce water exposure, provide drainage paths, use materials that tolerate moisture where needed, and avoid sealing old assemblies so tightly that hidden damage builds up.
That is especially true in homes that have already lasted 80 or 100 years. A good waterproofing plan does not erase the character of the house. It supports it. It makes the basement more reliable, protects framing and mechanical systems, improves air quality upstairs, and lets future renovations rest on something more dependable than hope.
Done well, these upgrades are not just about keeping the floor dry during the next thunderstorm. They preserve the parts of an older property that are hardest to replace. The framing above stays sounder. The air smells cleaner. Storage becomes practical. A lower level renovation has a fighting chance of lasting. And perhaps most important, the house stops sending that low-grade signal of dampness and neglect that so often follows unresolved water problems.
Older basements do not need perfection to perform better. They need the right sequence of improvements, applied with realism and care. That is where the strongest results usually come from.
ARD Waterproofing
98 Smull Ave, West Caldwell, NJ 07006, United States
+1 917-691-8411
FAQ About Basement Waterproofing
Can you 100% Waterproof a Basement in West Caldwell?
A properly designed system can substantially reduce basement water intrusion, but no method can promise protection against every flood, equipment failure, or future change in site conditions. The first step is identifying whether moisture comes from surface runoff, groundwater, plumbing, or condensation. Solutions may include grading and gutter improvements, drainage, foundation repairs, and a sump system. Review the specific coverage and exclusions of any written warranty.
How much does it cost to professionally waterproof a basement in NJ?
There is no single price that fits every basement. Cost depends on the cause of the leak, the area needing work, access, excavation requirements, drainage design, sump equipment, and restoration of disturbed finishes or landscaping. Request an on-site assessment and an itemized written estimate that explains the scope, exclusions, and maintenance requirements before comparing proposals.
How long does foundation waterproofing last in West Caldwell, NJ?
Service life varies with the waterproofing materials, installation quality, soil and water conditions, and maintenance. Drainage components and pumps may require servicing or replacement even when other parts of the system remain functional. Keep gutters, drainage outlets, and sump equipment maintained, and have recurring leaks or changes in foundation condition assessed. Ask for product-specific expectations and written warranty terms rather than relying on one lifespan for the entire system.